首页 > Python资料 博客日记
Python - Bert-VITS2 自定义训练语音
2024-03-19 14:00:04Python资料围观390次
目录
一.引言
前面我们通过视频 OCR 技术识别老剧台词、通过 Wave2Lip 技术实现人声同步、通过 GFP_GAN 实现图像人脸增强,还通过 Real-ESRGAN 实现了图像质量增强,相当于实现了图片、视频的全方位处理,本文基于语音进行自定义处理,通过 Bert-VITS2 训练自定义语音,模仿指定角色发声。
二.前期准备
1.Conda 环境搭建
git 地址: https://github.com/fishaudio/Bert-VITS2/

博主网不好,直接把代码下载下来了再传到服务器了。
cd Bert-VITS2-master

conda create -n vits2 python=3.9
conda activate vits2

pip install torch==2.0.1 torchvision==0.15.2 torchaudio==2.0.2
pip install -r requirements.txt

pip install openai-whisper
如果在国内安装比较慢,可以在 pip 命令后指定源,博主这里使用清华源:
pip install xxx -i https://pypi.tuna.tsinghua.edu.cn/simple执行完毕后激活环境:
conda activate vits22.Bert 模型下载
这里主要下载中文、英文、日文的相关 Bert 模型,用来识别文字,为什么有日本版本,后面了解了一下这个开源项目里很多大佬都喜欢玩原神,所以很多语音需要用到。这也可能是为什么 git 里开发大佬们的头像都很二次元的原因。
Tips:
这里最新版本需要下载 4 个 Bert 模型,老版本需要 3 个,大家可以在运行时关注模型的报错信息,一般是 Connection 请求失败,此时会打日志告知请求哪个 Hugging Face 的链接失败了,我们找到这个链接并在 bert 目录下找到对应文件地址,把模型文件都下进来就可以,这个比较有普适性。
◆ 中文
链接: https://huggingface.co/hfl/chinese-roberta-wwm-ext-large/tree/main
下载 pytorch_model.bin 文件,放置到 bert/chinese-roberta-wwm-ext-large/ 文件夹下:

◆ 英文
链接: https://huggingface.co/microsoft/deberta-v3-large/tree/main
下载 pytroch_model.bin 与 spm.model,放置到 bert/deberta-v3-large/ 文件夹下:

◆ 日文- 1
链接: https://huggingface.co/ku-nlp/deberta-v2-large-japanese/tree/main
下载 pytorch_model.bin,放置到 bert/deberta-v2-large-japanese/ 文件夹下:

◆ 日文- 2
链接: https://huggingface.co/ku-nlp/deberta-v2-large-japanese-char-wwm
下载 pytorch_model.bin,放置到 bert/deberta-v2-large-japanese-char-wwm/ 文件夹下:

3.预训练模型下载
预训练模型链接: https://openi.pcl.ac.cn/Stardust_minus/Bert-VITS2/

上面的链接包含 "Bert-VITS2中日底模" 文件,大家需要在页面注册后才能下载,模型下载后放到 /data/models 目录下,这里需要事先在 git 目录下 mkdir data 创建 data 文件夹:

三.数据准备
1.音频文件批量处理
由于我们的任务是训练学习目标角色的声音,所以需要准备对应角色的语音片段,语音是 mp3 格式,但是音频处理一般都会转换为 wav 格式。
◆ 创建文件地址
首先在项目内创建文件夹存储对应音频内容:
mkdir -p data
mkdir -p data/long
mkdir -p data/short
mkdir -p data/long/swk
这里 long 存放长语音,short 存放短语音,当然如果你是现成切好的,那就直接都放到 short 就可以,这里博主准备了一段孙悟空的长语音放在 long 文件夹下。

◆ 长短语音切割
在项目内创建 spilit_reg.py,在 main 函数下的 persons 数组内传入 long 文件夹内角色的名称,如果有多个角色训练样本,可以在数组中传入多个。
import os
from pathlib import Path
import librosa
from scipy.io import wavfile
import numpy as np
import whisper


def split_long_audio(model, filepaths, save_dir, person, out_sr=44100):
    files = os.listdir(filepaths)
    filepaths=[os.path.join(filepaths, i) for i in files]

    for file_idx, filepath in enumerate(filepaths):

        save_path = Path(save_dir)
        save_path.mkdir(exist_ok=True, parents=True)

        print(f"Transcribing file {file_idx}: '{filepath}' to segments...")
        result = model.transcribe(filepath, word_timestamps=True, task="transcribe", beam_size=5, best_of=5)
        segments = result['segments']

        wav, sr = librosa.load(filepath, sr=None, offset=0, duration=None, mono=True)
        wav, _ = librosa.effects.trim(wav, top_db=20)
        peak = np.abs(wav).max()
        if peak > 1.0:
            wav = 0.98 * wav / peak
        wav2 = librosa.resample(wav, orig_sr=sr, target_sr=out_sr)
        wav2 /= max(wav2.max(), -wav2.min())

        for i, seg in enumerate(segments):
            start_time = seg['start']
            end_time = seg['end']
            wav_seg = wav2[int(start_time * out_sr):int(end_time * out_sr)]
            wav_seg_name = f"{person}_{i}.wav"
            i += 1
            out_fpath = save_path / wav_seg_name
            wavfile.write(out_fpath, rate=out_sr, data=(wav_seg * np.iinfo(np.int16).max).astype(np.int16))


# 使用whisper语音识别
def transcribe_one(audio_path):
    audio = whisper.load_audio(audio_path)
    audio = whisper.pad_or_trim(audio)
    mel = whisper.log_mel_spectrogram(audio).to(model.device)
    _, probs = model.detect_language(mel)
    print(f"Detected language: {max(probs, key=probs.get)}")
    lang = max(probs, key=probs.get)
    options = whisper.DecodingOptions(beam_size=5)
    result = whisper.decode(model, mel, options)

    print(result.text)
    return result.text


if __name__ == '__main__':
    whisper_size = "medium"
    model = whisper.load_model(whisper_size)

    persons = ['swk']

    for person in persons:
        audio_path = f"./data/short/{person}"
        if os.path.exists(audio_path):
            for filename in os.listdir(audio_path):
                file_path = os.path.join(audio_path, filename)
                os.remove(file_path)
        split_long_audio(model, f"./data/long/{person}", f"./data/short/{person}", person)
        files = os.listdir(audio_path)
        file_list_sorted = sorted(files, key=lambda x: int(os.path.splitext(x)[0].split('_')[1]))
        filepaths = [os.path.join(audio_path, i) for i in file_list_sorted]
        for file_idx, filepath in enumerate(filepaths):
            text = transcribe_one(filepath)
            with open(f"./data/short/{person}/{person}_{file_idx}.lab", 'w') as f:
                f.write(text)
上面的代码会把长音频分割为多个短音频,并且识别语音内容,结果放置在 /data/short 下对应的 peoson 目录中:
python spilit_reg.py wav 为切割后的短音频,lab 为语音识别的内容。

2.训练文件地址生成
在项目下 vim gen_filelist.py
import os

out_file = f"filelists/full.txt"

def process():
    persons = ['swk']
    ch_language = 'ZH'

    with open(out_file, 'w', encoding="Utf-8") as wf:
        for person in persons:
            path = f"./data/short/{person}"
            files = os.listdir(path)
            for f in files:
                if f.endswith(".lab"):
                    with open(os.path.join(path, f), 'r', encoding="utf-8") as perFile:
                        line = perFile.readline()
                        result = f"./data/short/{person}/{f.split('.')[0]}.wav|{person}|{ch_language}|{line}"
                        wf.write(f"{result}\n")


if __name__ == "__main__":
    process()
和上面一样,将 persons 文件夹写入自己的单个或多个角色名称对应的文件夹名字,语言就 ZH 即中文。
python gen_filelist.py运行后在 filelists 文件夹下生成 full.txt 文件,其内部保存了训练地址与中文以及音频的对应:
...

./data/short/swk/swk_3.wav|swk|ZH|不见
./data/short/swk/swk_82.wav|swk|ZH|早上喂養白馬水草條魚

...
3.模型训练配置生成
◆ 默认配置生成
python preprocess_text.py
第一次执行 preprocess_text.py 文件会基于 configs 的文件生成默认的 config.yml 配置文件。
已根据默认配置文件default_config.yml生成配置文件config.yml。请按该配置文件的说明进行配置后重新运行。
如无特殊需求,请勿修改default_config.yml或备份该文件。
◆ 自定义配置
配置文件很长,我们主要改变下面几项:
- resample 对应我们的输入输出数据地址
- preprocess_text 对应我们预处理后生成的文件对应地址
- bert_gen bert 生成的配置文件地址,这个是源代码自带的,可以修改
- train_ms 配置训练的内容,models 为基座模型即我们上面刚下的预训练模型
- webui 这里根据自己情况定,博主在服务器上非本机开发,所以没有用 webui
dataset_path: ""

resample:
  in_dir: "data/short"
  out_dir: "data/short"

preprocess_text:
  transcription_path: "filelists/full.txt"
  cleaned_path: ""
  train_path: "filelists/train.txt"
  val_path: "filelists/val.txt"
  config_path: "configs/config.json"

bert_gen:
  config_path: "configs/config.json"

train_ms:
  model: "data/models"
  config_path: "configs/config.json"

webui:
  device: "cuda"
  model: "models/G_8000.pth"
  config_path: "configs/config.json"
除此之外,一些更详细的配置,例如 train_ms 里训练的 epoch 等等,可以在 configs/config.json 查看并修改:

◆ 更新配置生成
python preprocess_text.py
上面的配置修改完成后,再次运行会基于配置分割 train/val 并放置到 filelists 文件夹下:

4.训练文件重采样
上面配置中指定了 resampel 的目录,我们再次运行即可实现 resample,resample 后会覆盖之前的 wav 文件。
5.Tensor pt 文件生成
python bert_gen.py
运行 bert_gen 代码,在对应 persons 的 short 目录下,会新增 .pt 文件,至此我们的数据准备完毕,链路比较长,但是多操作几次发现都是固定套路,这里 bert 语音识别时运行时间稍长需要耐心等待:

四.模型训练
1.预训练模型
上面前期准备我们已经准备了底模文件作为我们训练的 baseline,后续的新模型将基于 baseline 进行,这里有三个文件:
- D_0.pth
生成对抗网络里判别器 (Discriminator) 的初始数据,其负责区分真实数据和生成器生成的假数据。
- DUR_0.pth
这里博主没有细看论文,不太确定这模型的作用,不过大致看提到过几次 Duration,不知道是不是和音频时长相关。
- G_0.pth
生成对抗网络中生成器 (Generator) 的权重,其任务是生成以假乱真的数据。
2.模型训练
训练数据放在了 data/short 文件下,大家也可以自己修改,只要预处理步骤还有 config.yml 文件能够互相匹配即可,训练配置则到 configs/config.json 修改即可:
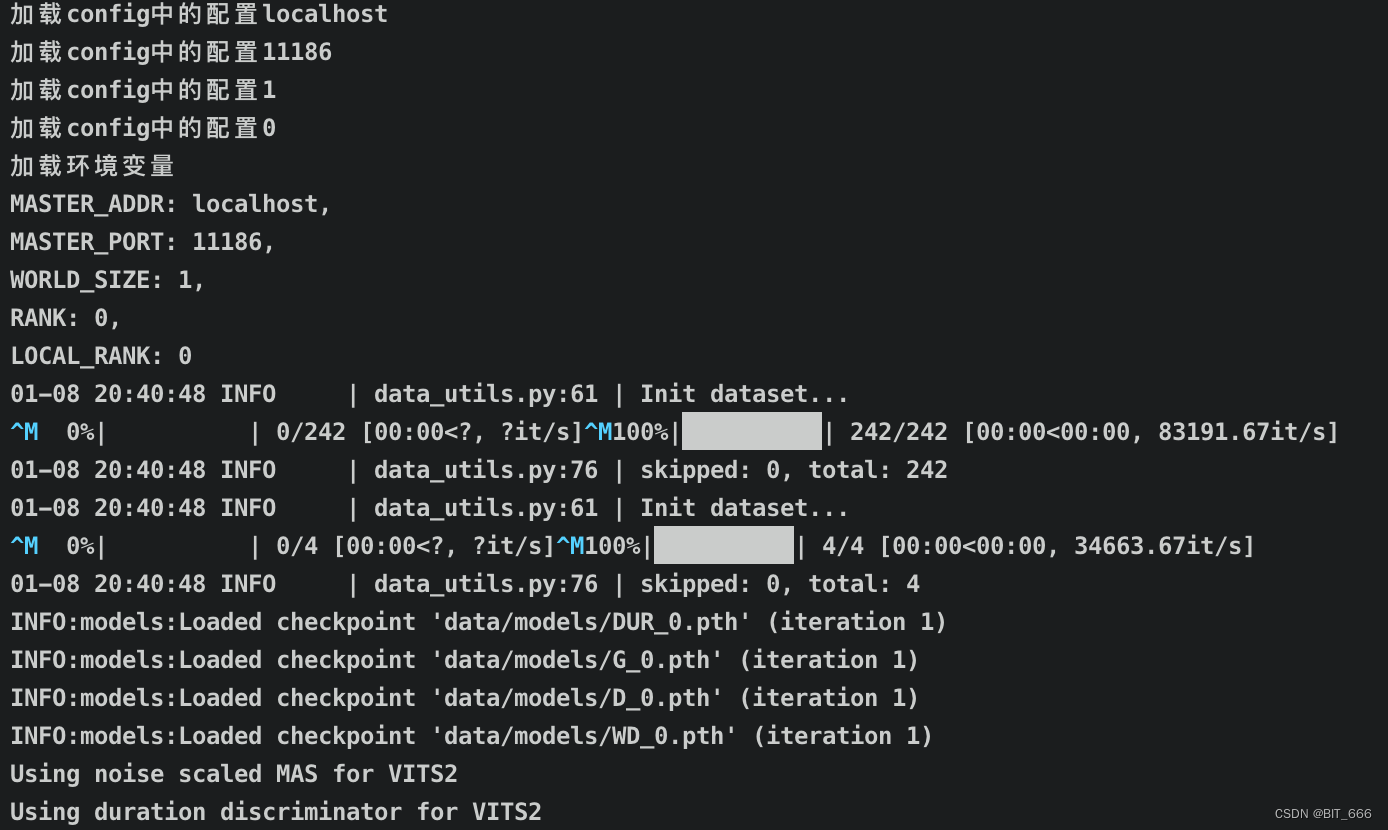
nohup python train_ms.py > log 2>&1 &后台开启训练,出现下述日志代表训练开始:

Tips:
这里有几个点可能需要修改,否则会训练报错。
◆ LocalRank

在 train_ms.py 上方加入一行代码,否则可能会报错 KeyError: 'Local_RANK':
os.environ["LOCAL_RANK"] = '0'
◆ Float64

博主采用 V100 显卡训练,提示不支持 torch.bfloat16 格式,所以需要把 train_ms.py 里用到 bfloat16 的都修改为 float16,大家可以根据自己的显卡情况调整,能支持的话最好。
3.模型收菜
训练配置中默认保留最近的 8 个 Checkpoint,所以 D/G/DUR 都保存了近半个以及原始的模型权重:

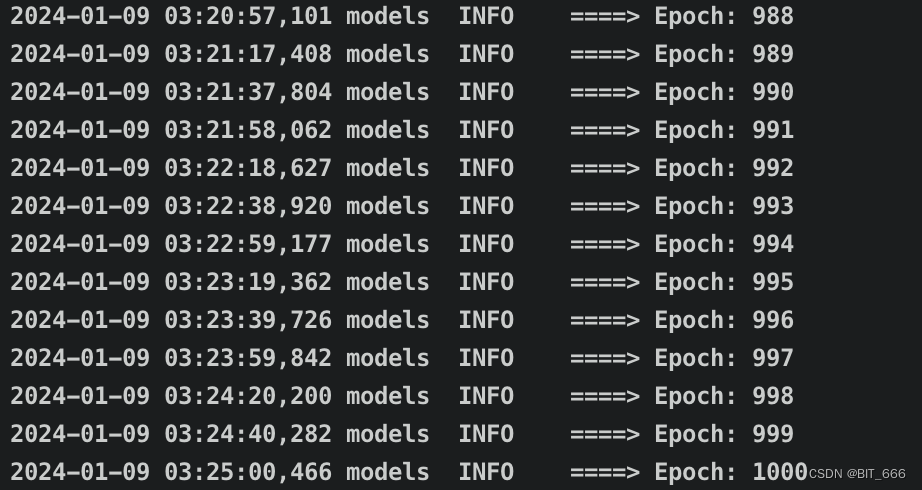
这里训练了 1000 个 epoch:

模型训练部分的分享就到这里,后面有空我们继续分享如何使用自定义模型进行推理。
五.总结
视频识别 OCR: https://blog.csdn.net/BIT_666/article/details/134308219
人脸修复 GFP_GAN: https://blog.csdn.net/BIT_666/article/details/134263119
图声对应 Wave2Lip: https://blog.csdn.net/BIT_666/article/details/134506504
画质提升 Real-ESRGAN :https://blog.csdn.net/BIT_666/article/details/134688586
上面是前面一段时间分享的图像、视频以及语音的相关算法内容,大家有兴趣也可以根据对应步骤去本机实现,本文 VITS2 语音生成服务特别感谢下文老哥提供的训练思路:
@智慧医疗探索者: https://blog.csdn.net/lsb2002/article/details/134294018
标签:
上一篇:python的websocket方法教程
下一篇:PyQt5 GUI编程
相关文章
最新发布
- 光流法结合深度学习神经网络的原理及应用(完整代码都有Python opencv)
- Python 图像处理进阶:特征提取与图像分类
- 大数据可视化分析-基于python的电影数据分析及可视化系统_9532dr50
- 【Python】入门(运算、输出、数据类型)
- 【Python】第一弹---解锁编程新世界:深入理解计算机基础与Python入门指南
- 华为OD机试E卷 --第k个排列 --24年OD统一考试(Java & JS & Python & C & C++)
- Python已安装包在import时报错未找到的解决方法
- 【Python】自动化神器PyAutoGUI —告别手动操作,一键模拟鼠标键盘,玩转微信及各种软件自动化
- Pycharm连接SQL Sever(详细教程)
- Python编程练习题及解析(49题)
点击排行
- 版本匹配指南:Numpy版本和Python版本的对应关系
- 版本匹配指南:PyTorch版本、torchvision 版本和Python版本的对应关系
- Anaconda版本和Python版本对应关系(持续更新...)
- 相关性分析——Pearson相关系数+热力图(附data和Python完整代码)
- Python 可视化 web 神器:streamlit、Gradio、dash、nicegui;低代码 Python Web 框架:PyWebIO
- Windows上安装 Python 环境并配置环境变量 (超详细教程)
- Python与PyTorch的版本对应
- 安装spacy+zh_core_web_sm避坑指南


