首页 > Python资料 博客日记
yolov8实战第三天——yolov8TensorRT部署(python推理)(保姆教学)
2024-02-25 02:00:06Python资料围观483次
在上一篇中我们使用自己的数据集训练了一个yolov8检测模型,best.py。
yolov8实战第一天——yolov8部署并训练自己的数据集(保姆式教程)-CSDN博客
yolov8实战第二天——yolov8训练结果分析(保姆式解读)-CSDN博客
接下要对best.py进行TensorRT优化并部署。
TensorRT是一种高性能深度学习推理优化器和运行时加速库,可以为深度学习应用提供低延迟、高吞吐率的部署推理。
TensorRT可用于对超大规模数据中心、嵌入式平台或自动驾驶平台进行推理加速。
TensorRT现已能支持TensorFlow、Caffe、Mxnet、Pytorch等几乎所有的深度学习框架,将TensorRT和NVIDIA的GPU结合起来,能在几乎所有的框架中进行快速和高效的部署推理。
一般的深度学习项目,训练时为了加快速度,会使用多GPU分布式训练。但在部署推理时,为了降低成本,往往使用单个GPU机器甚至嵌入式平台(比如 NVIDIA Jetson)进行部署,部署端也要有与训练时相同的深度学习环境,如caffe,TensorFlow等。
由于训练的网络模型可能会很大(比如,inception,resnet等),参数很多,而且部署端的机器性能存在差异,就会导致推理速度慢,延迟高。这对于那些高实时性的应用场合是致命的,比如自动驾驶要求实时目标检测,目标追踪等。
为了提高部署推理的速度,出现了很多模型优化的方法,如:模型压缩、剪枝、量化、知识蒸馏等,这些一般都是在训练阶段实现优化。
而TensorRT 则是对训练好的模型进行优化,通过优化网络计算图提高模型效率。
一、安装TensorRT
下载TensorRT 。
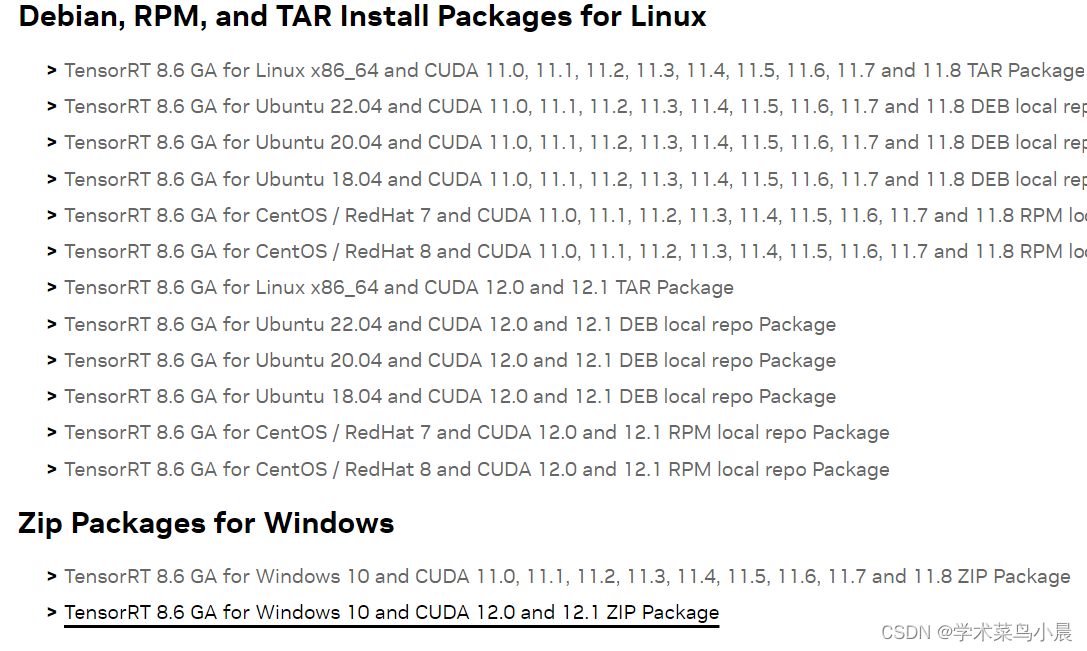
我下载的是8.6里画黑线的那个。
将 TensorRT-8.6.1.6\include中头文件 copy 到C:\Program Files\NVIDIA GPU Computing Toolkit\CUDA\v11.7\include
将TensorRT-8.6.1.6\lib 中所有lib文件 copy 到C:\Program Files\NVIDIA GPU Computing Toolkit\CUDA\v11.7\lib\x64
将TensorRT-8.6.1.6\lib 中所有dll文件copy 到C:\Program Files\NVIDIA GPU Computing Toolkit\CUDA\v11.7\bin
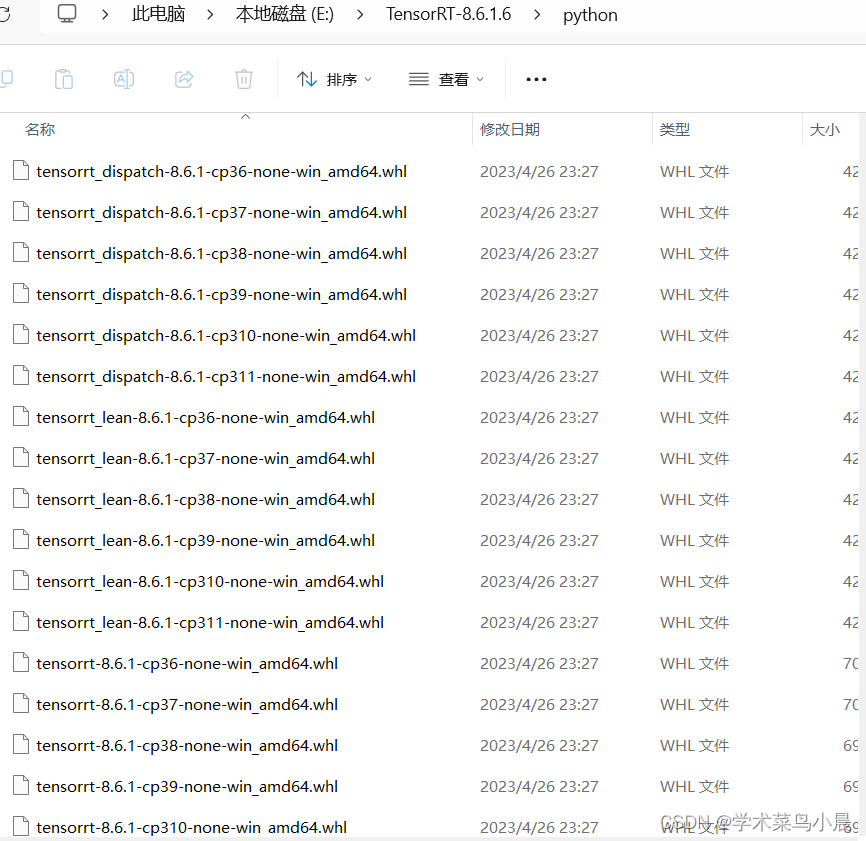
在python文件夹中找到适合自己的。
pip install tensorrt-8.6.1-cp310-none-win_amd64.whl 至此TensorRT安装完成。
二、pt转onnx:
GitHub - triple-Mu/YOLOv8-TensorRT: YOLOv8 using TensorRT accelerate !
参考着这个,下载,安装环境后。
安装onnx:
pip install onnx -i https://pypi.tuna.tsinghua.edu.cn/simple
pip install onnxsim -i https://pypi.tuna.tsinghua.edu.cn/simple
pip install onnxruntime -i https://pypi.tuna.tsinghua.edu.cn/simple
生成onnx:
python export-det.py --weights yolov8n.pt --iou-thres 0.65 --conf-thres 0.25 --topk 100 --opset 11 --sim --input-shape 1 3 640 640 --device cuda:0
使用上篇文章中的老鼠模型做了测试:
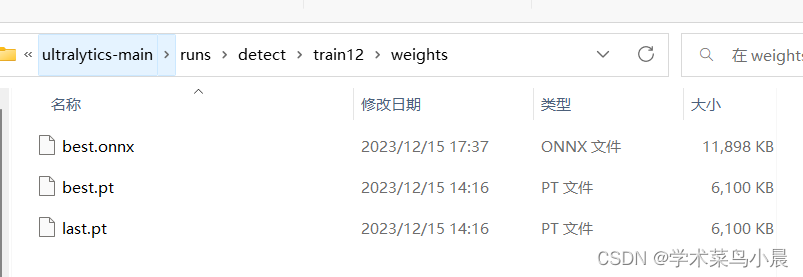
onnx的测试代码:
import onnxruntime as rt
import numpy as np
import cv2
import  matplotlib.pyplot as plt


def nms(pred, conf_thres, iou_thres):
    conf = pred[..., 4] > conf_thres
    box = pred[conf == True]
    cls_conf = box[..., 5:]
    cls = []
    for i in range(len(cls_conf)):
        cls.append(int(np.argmax(cls_conf[i])))
    total_cls = list(set(cls))
    output_box = []
    for i in range(len(total_cls)):
        clss = total_cls[i]
        cls_box = []
        for j in range(len(cls)):
            if cls[j] == clss:
                box[j][5] = clss
                cls_box.append(box[j][:6])
        cls_box = np.array(cls_box)
        box_conf = cls_box[..., 4]
        box_conf_sort = np.argsort(box_conf)
        max_conf_box = cls_box[box_conf_sort[len(box_conf) - 1]]
        output_box.append(max_conf_box)
        cls_box = np.delete(cls_box, 0, 0)
        while len(cls_box) > 0:
            max_conf_box = output_box[len(output_box) - 1]
            del_index = []
            for j in range(len(cls_box)):
                current_box = cls_box[j]
                interArea = getInter(max_conf_box, current_box)
                iou = getIou(max_conf_box, current_box, interArea)
                if iou > iou_thres:
                    del_index.append(j)
            cls_box = np.delete(cls_box, del_index, 0)
            if len(cls_box) > 0:
                output_box.append(cls_box[0])
                cls_box = np.delete(cls_box, 0, 0)
    return output_box


def getIou(box1, box2, inter_area):
    box1_area = box1[2] * box1[3]
    box2_area = box2[2] * box2[3]
    union = box1_area + box2_area - inter_area
    iou = inter_area / union
    return iou


def getInter(box1, box2):
    box1_x1, box1_y1, box1_x2, box1_y2 = box1[0] - box1[2] / 2, box1[1] - box1[3] / 2, \
                                         box1[0] + box1[2] / 2, box1[1] + box1[3] / 2
    box2_x1, box2_y1, box2_x2, box2_y2 = box2[0] - box2[2] / 2, box2[1] - box1[3] / 2, \
                                         box2[0] + box2[2] / 2, box2[1] + box2[3] / 2
    if box1_x1 > box2_x2 or box1_x2 < box2_x1:
        return 0
    if box1_y1 > box2_y2 or box1_y2 < box2_y1:
        return 0
    x_list = [box1_x1, box1_x2, box2_x1, box2_x2]
    x_list = np.sort(x_list)
    x_inter = x_list[2] - x_list[1]
    y_list = [box1_y1, box1_y2, box2_y1, box2_y2]
    y_list = np.sort(y_list)
    y_inter = y_list[2] - y_list[1]
    inter = x_inter * y_inter
    return inter


def draw(img, xscale, yscale, pred):
    img_ = img.copy()
    if len(pred):
        for detect in pred:
            detect = [int((detect[0] - detect[2] / 2) * xscale), int((detect[1] - detect[3] / 2) * yscale),
                      int((detect[0]+detect[2] / 2) * xscale), int((detect[1]+detect[3] / 2) * yscale)]
            img_ = cv2.rectangle(img, (detect[0], detect[1]), (detect[2], detect[3]), (0, 255, 0), 1)
    return img_


if __name__ == '__main__':
    height, width = 640, 640
    img0 = cv2.imread('mouse-4-6-0004.jpg')
    x_scale = img0.shape[1] / width
    y_scale = img0.shape[0] / height
    img = img0 / 255.
    img = cv2.resize(img, (width, height))
    img = np.transpose(img, (2, 0, 1))
    data = np.expand_dims(img, axis=0)
    sess = rt.InferenceSession('best.onnx')
    input_name = sess.get_inputs()[0].name
    label_name = sess.get_outputs()[0].name
    pred = sess.run([label_name], {input_name: data.astype(np.float32)})[0]
    pred = np.squeeze(pred)
    pred = np.transpose(pred, (1, 0))
    pred_class = pred[..., 4:]
    pred_conf = np.max(pred_class, axis=-1)
    pred = np.insert(pred, 4, pred_conf, axis=-1)
    result = nms(pred, 0.3, 0.45)
    ret_img = draw(img0, x_scale, y_scale, result)
    ret_img = ret_img[:, :, ::-1]
    plt.imshow(ret_img)
    plt.show()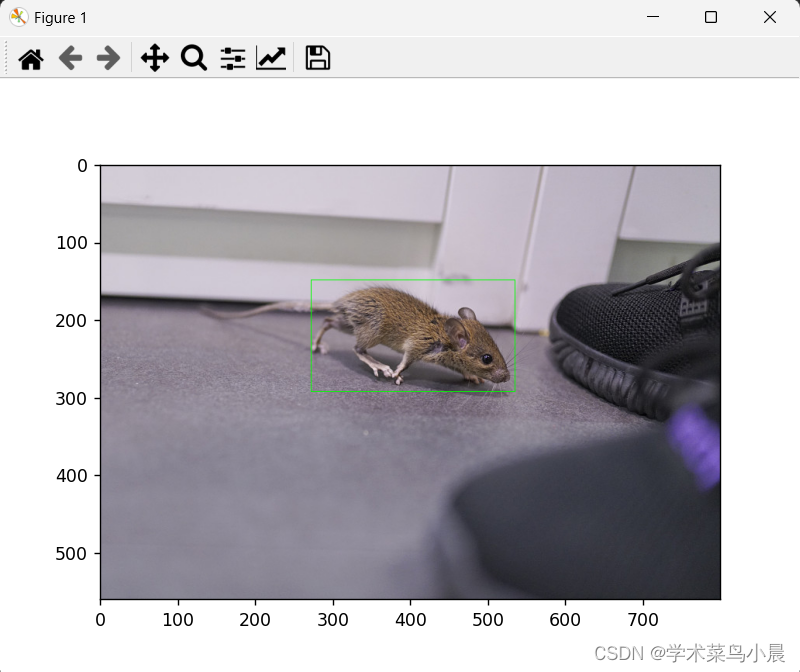
三、TensorRT部署
导出engine模型:
python build.py --weights yolov8n.onnx --iou-thres 0.65 --conf-thres 0.25 --topk 100 --fp16 --device cuda:0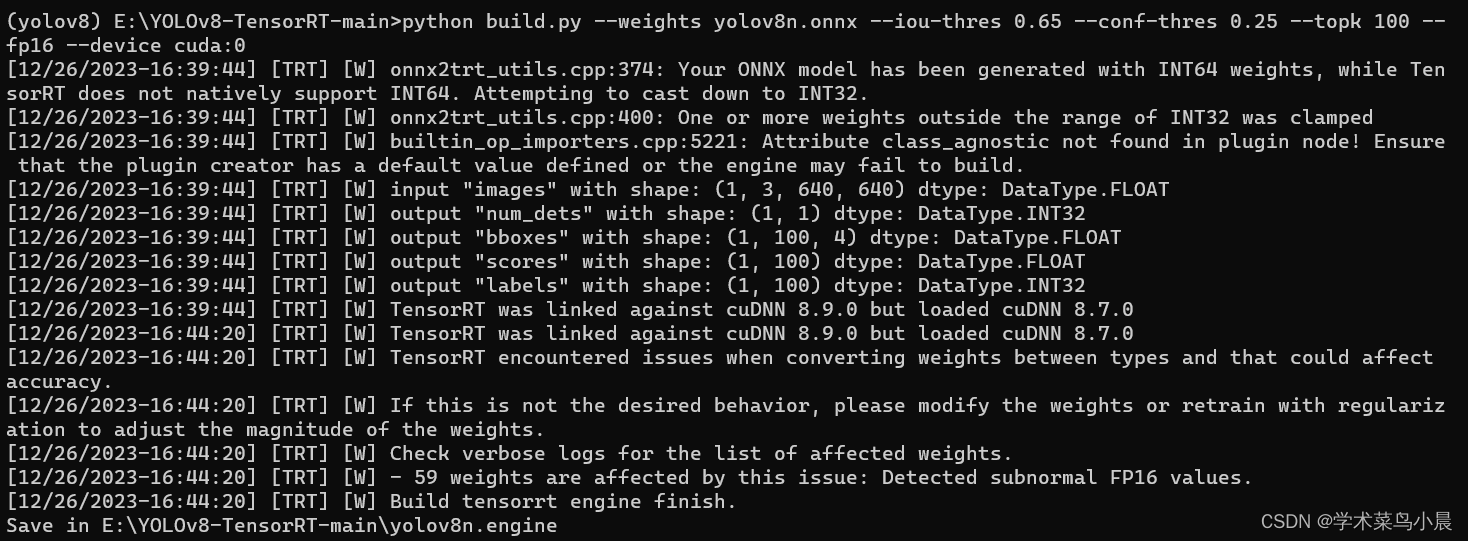
等待一会,engine成功导出。

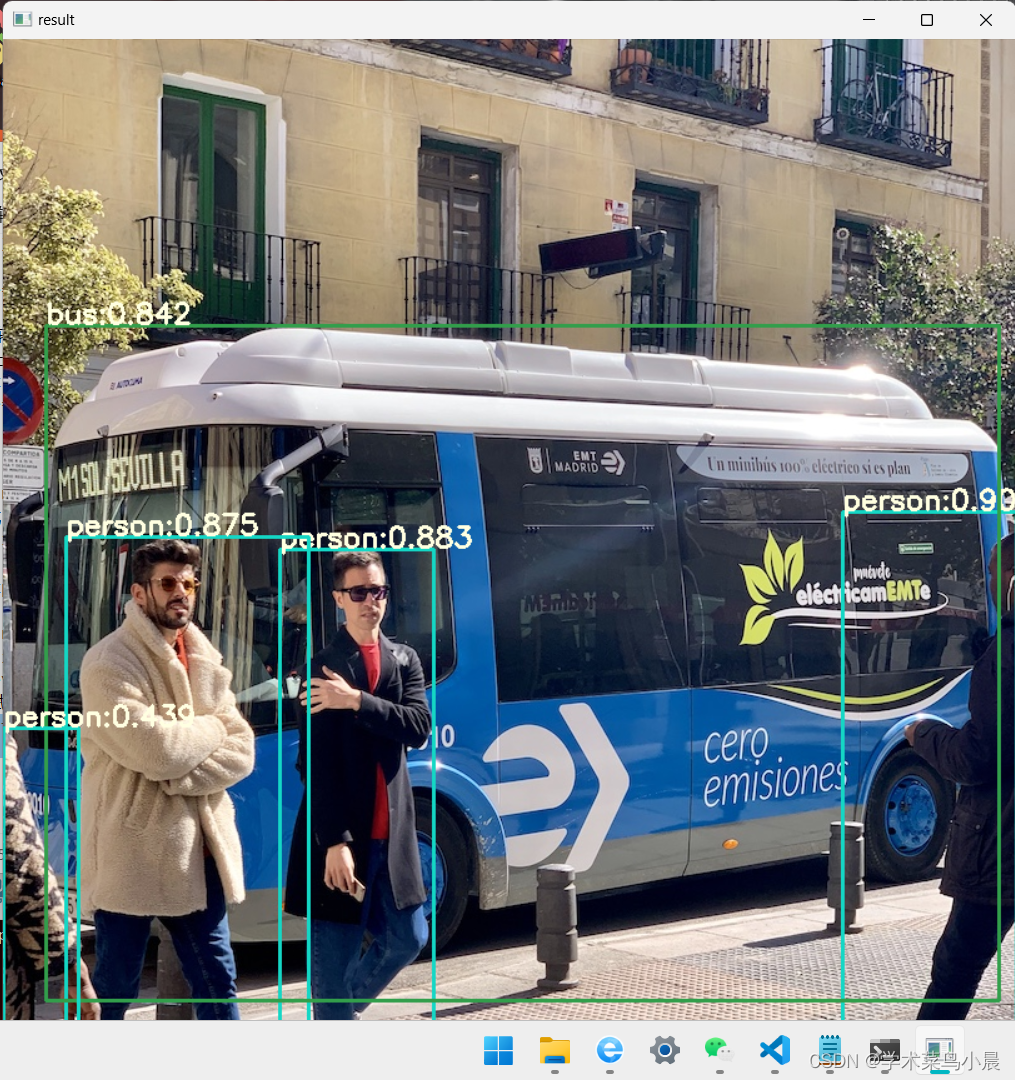
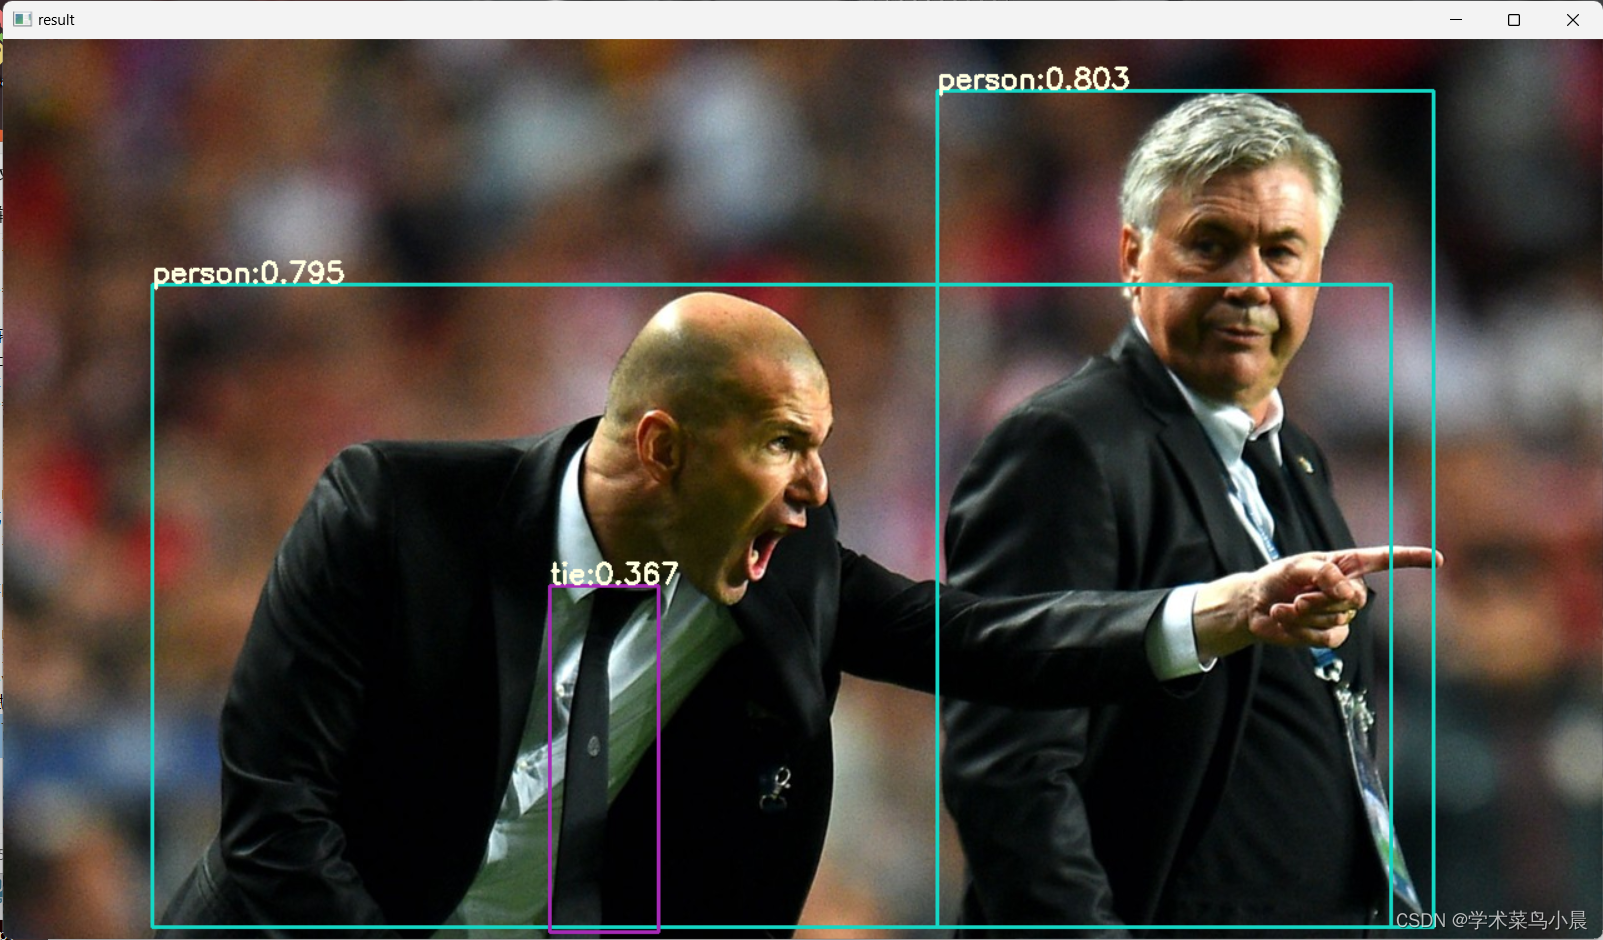
使用python脚本进行推理:
python infer-det.py --engine yolov8n.engine --imgs data --show --out-dir outputs --out-dir outputs --device cuda:0infer-det.py:
from models import TRTModule  # isort:skip
import argparse
from pathlib import Path

import cv2
import torch

from config import CLASSES, COLORS
from models.torch_utils import det_postprocess
from models.utils import blob, letterbox, path_to_list


def main(args: argparse.Namespace) -> None:
    device = torch.device(args.device)
    Engine = TRTModule(args.engine, device)
    H, W = Engine.inp_info[0].shape[-2:]

    # set desired output names order
    Engine.set_desired(['num_dets', 'bboxes', 'scores', 'labels'])

    images = path_to_list(args.imgs)
    save_path = Path(args.out_dir)

    if not args.show and not save_path.exists():
        save_path.mkdir(parents=True, exist_ok=True)

    for image in images:
        save_image = save_path / image.name
        bgr = cv2.imread(str(image))
        draw = bgr.copy()
        bgr, ratio, dwdh = letterbox(bgr, (W, H))
        rgb = cv2.cvtColor(bgr, cv2.COLOR_BGR2RGB)
        tensor = blob(rgb, return_seg=False)
        dwdh = torch.asarray(dwdh * 2, dtype=torch.float32, device=device)
        tensor = torch.asarray(tensor, device=device)
        # inference
        data = Engine(tensor)

        bboxes, scores, labels = det_postprocess(data)
        if bboxes.numel() == 0:
            # if no bounding box
            print(f'{image}: no object!')
            continue
        bboxes -= dwdh
        bboxes /= ratio

        for (bbox, score, label) in zip(bboxes, scores, labels):
            bbox = bbox.round().int().tolist()
            cls_id = int(label)
            cls = CLASSES[cls_id]
            color = COLORS[cls]
            cv2.rectangle(draw, bbox[:2], bbox[2:], color, 2)
            cv2.putText(draw,
                        f'{cls}:{score:.3f}', (bbox[0], bbox[1] - 2),
                        cv2.FONT_HERSHEY_SIMPLEX,
                        0.75, [225, 255, 255],
                        thickness=2)
        if args.show:
            cv2.imshow('result', draw)
            cv2.waitKey(0)
        else:
            cv2.imwrite(str(save_image), draw)


def parse_args() -> argparse.Namespace:
    parser = argparse.ArgumentParser()
    parser.add_argument('--engine', type=str, help='Engine file')
    parser.add_argument('--imgs', type=str, help='Images file')
    parser.add_argument('--show',
                        action='store_true',
                        help='Show the detection results')
    parser.add_argument('--out-dir',
                        type=str,
                        default='./output',
                        help='Path to output file')
    parser.add_argument('--device',
                        type=str,
                        default='cuda:0',
                        help='TensorRT infer device')
    args = parser.parse_args()
    return args


if __name__ == '__main__':
    args = parse_args()
    main(args)
标签:
相关文章
最新发布
- 光流法结合深度学习神经网络的原理及应用(完整代码都有Python opencv)
- Python 图像处理进阶:特征提取与图像分类
- 大数据可视化分析-基于python的电影数据分析及可视化系统_9532dr50
- 【Python】入门(运算、输出、数据类型)
- 【Python】第一弹---解锁编程新世界:深入理解计算机基础与Python入门指南
- 华为OD机试E卷 --第k个排列 --24年OD统一考试(Java & JS & Python & C & C++)
- Python已安装包在import时报错未找到的解决方法
- 【Python】自动化神器PyAutoGUI —告别手动操作,一键模拟鼠标键盘,玩转微信及各种软件自动化
- Pycharm连接SQL Sever(详细教程)
- Python编程练习题及解析(49题)
点击排行
- 版本匹配指南:Numpy版本和Python版本的对应关系
- 版本匹配指南:PyTorch版本、torchvision 版本和Python版本的对应关系
- Anaconda版本和Python版本对应关系(持续更新...)
- 相关性分析——Pearson相关系数+热力图(附data和Python完整代码)
- Python 可视化 web 神器:streamlit、Gradio、dash、nicegui;低代码 Python Web 框架:PyWebIO
- Windows上安装 Python 环境并配置环境变量 (超详细教程)
- Python与PyTorch的版本对应
- 安装spacy+zh_core_web_sm避坑指南

